
Introduction
Is your Lenovo laptop automatically shutting down, going into hibernate, or locking itself when the battery drops to 10% or less? If so, you’re not alone. Many Lenovo IdeaPad users face this frustrating issue, especially when the battery saver is turned on. This guide will help you understand why it happens and walk you through a step-by-step solution to permanently fix it.
🎥 Prefer Watching the Fix Instead?
If you’re more of a visual learner or want to see exactly how it’s done, check out the video below:
📺 Want to watch this video on YouTube? Click or tap the link below:
https://youtu.be/GJKG9Ys5Gx8
Summary of the Problem
When the battery level drops to around 10% on a Lenovo laptop—especially models like the IdeaPad 320—users may find that the system locks, hibernates, or even shuts down completely. Afterward, pressing the power button might not turn the laptop back on immediately, making it seem unresponsive or even dead. The issue typically stems from a combination of aggressive power-saving settings, battery saver conflicts, and hardware power management defaults.
Problem Symptoms
Here are the common symptoms users experience:
- Laptop automatically locks or shuts down at 10% battery.
- Battery saver is enabled at the time of shutdown.
- Laptop does not turn on immediately after pressing the power button.
- System feels unresponsive until the charger is plugged in.
- The issue repeats unless settings are manually changed.
How to Fix It – Step-by-Step Guide
Follow these instructions carefully to restore your laptop’s proper behavior and prevent auto shutdown or hibernation in the future.
Step 1: Power Up the Laptop
Plug your laptop charger into a power socket.
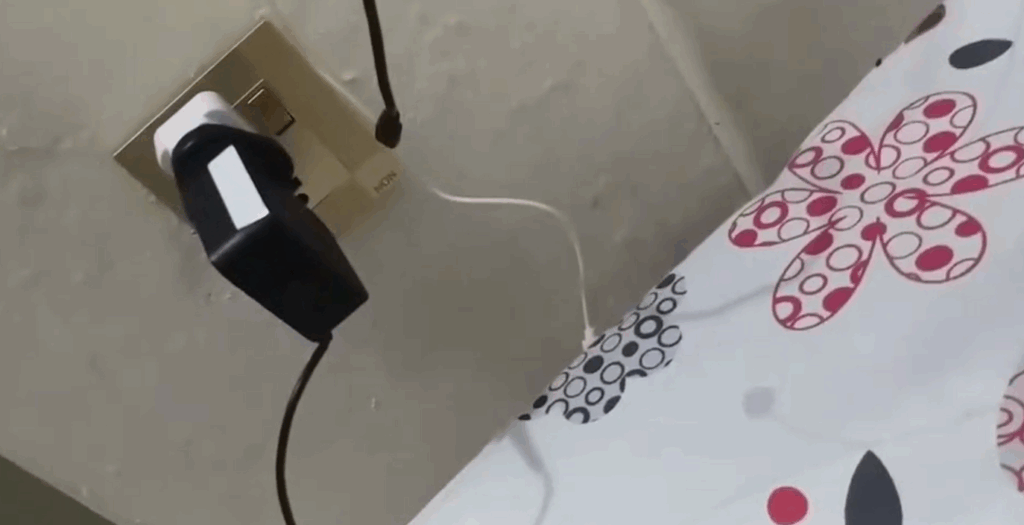
Insert the charging pin into the laptop’s charging port.

Wait for at least 2 minutes to allow the battery to stabilize.
Press the power button.

✅ This jumpstarts your system if it has gone into deep hibernation.
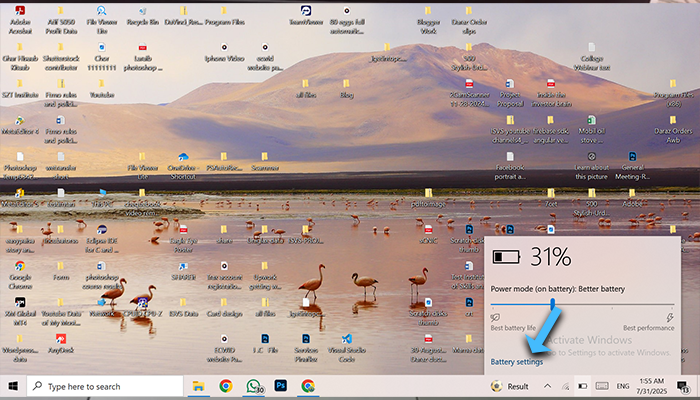
Step 2: Adjust Battery Saver Settings
Click on the battery icon in your taskbar.
Select Battery settings.
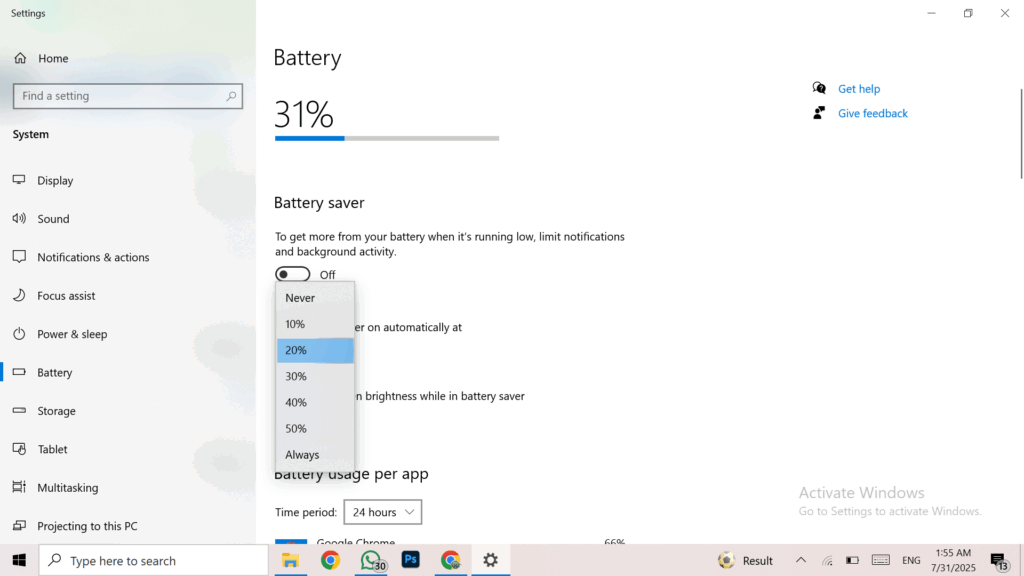
Under Battery saver, find the dropdown near “Turn battery saver on automatically at” and set it to Never.
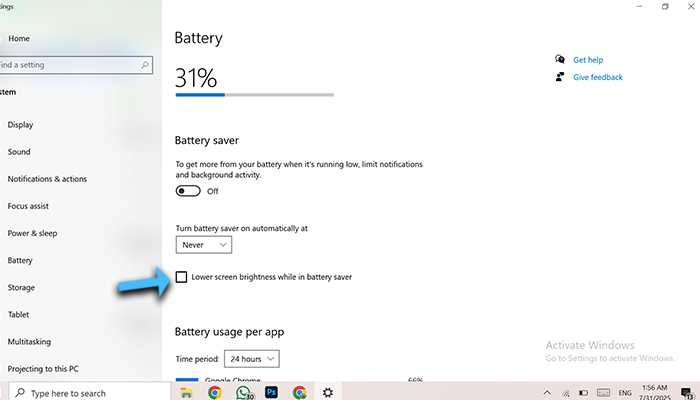
Uncheck the box that says “Lower screen brightness while in battery saver”.
Step 3: Perform a Shift + Restart
Press and hold the Shift key on your keyboard.

While holding it, go to the Start menu, then click Power, and choose Restart.
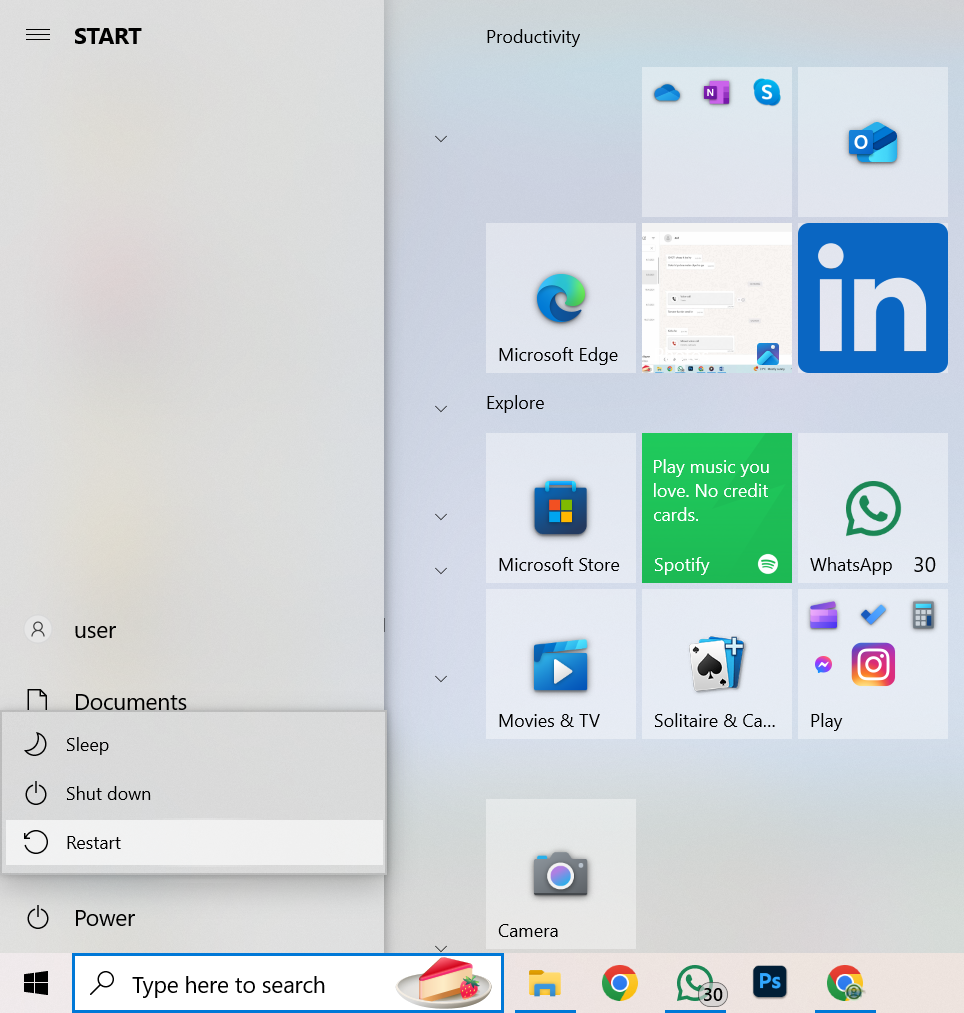
Keep holding the Shift key until the blue Windows recovery screen appears.
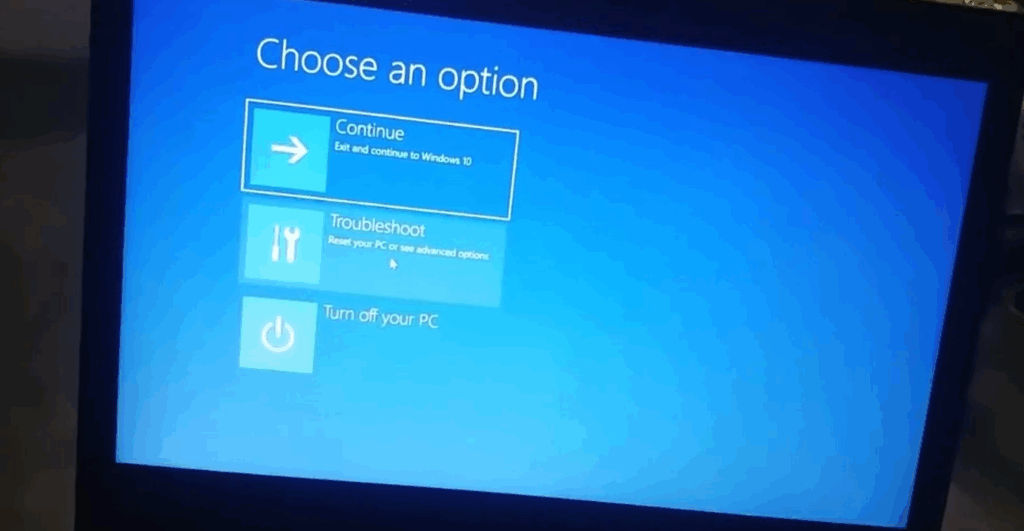
Step 4: Boot into Safe Mode
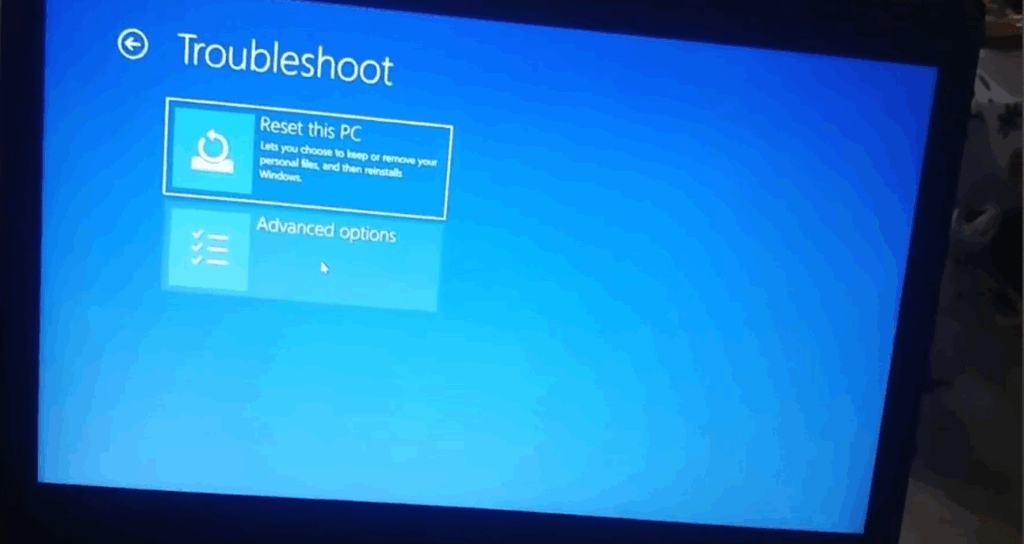
In the recovery screen, click Troubleshoot.
Select Advanced Options.
Click Startup Settings.

Click Restart.
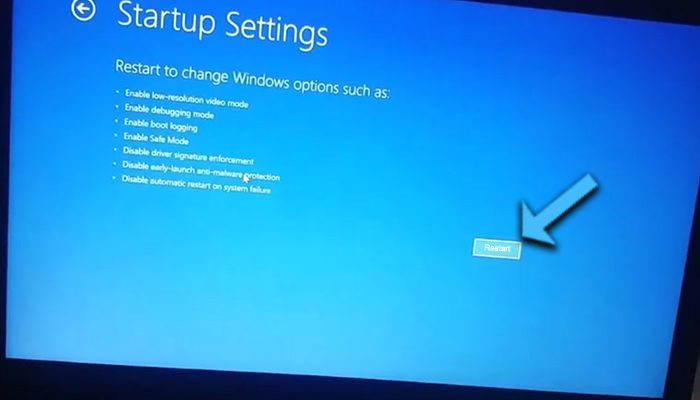
Press the 4 key to enable Safe Mode.
Step 5: Modify Power Options
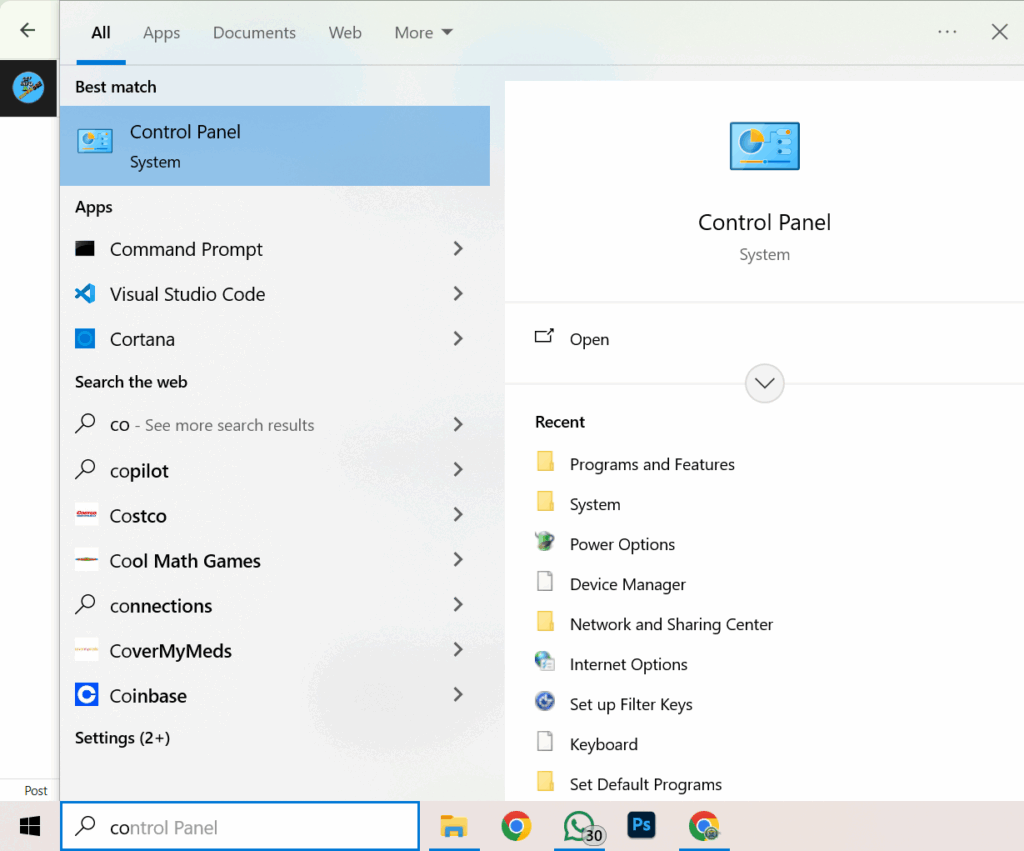
Open the Control Panel.
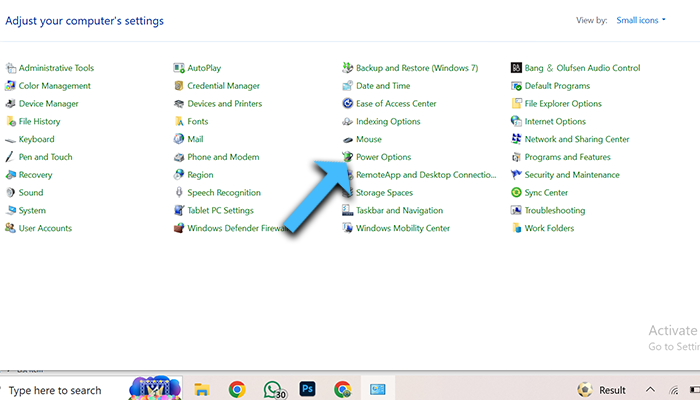
In the top right, change the view to Small Icons.
Click on Power Options.
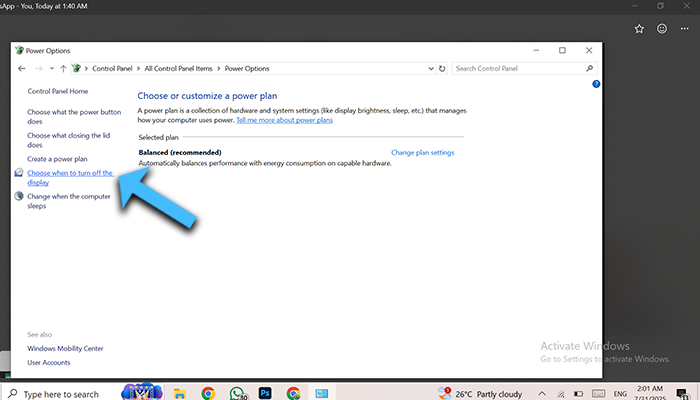
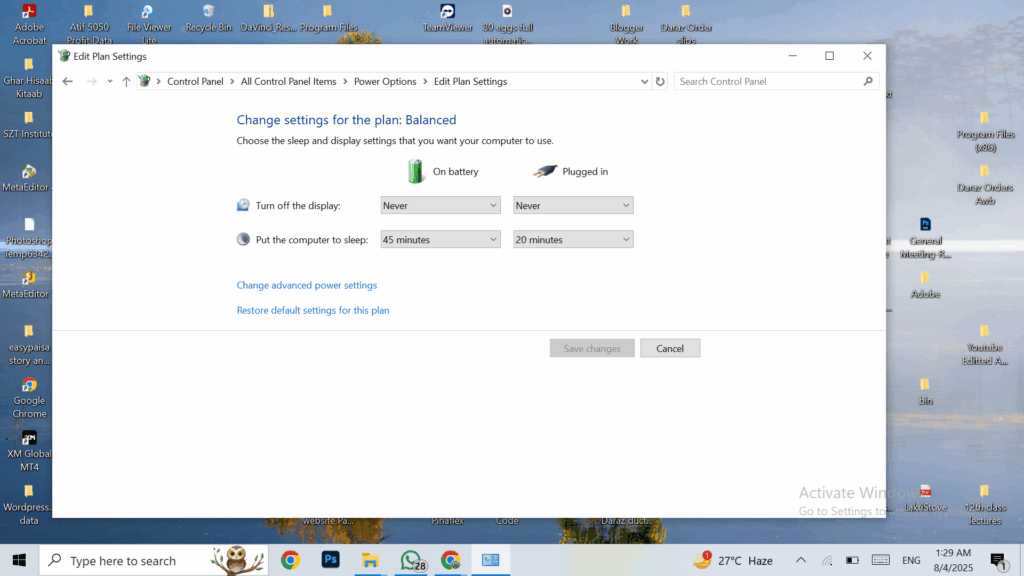
On the left panel, click Choose when to turn off the display.
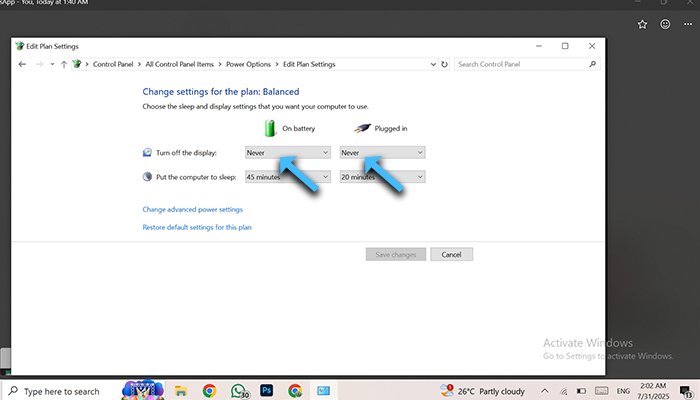
Turn off the display option to Never.
Click on Change advanced power settings.
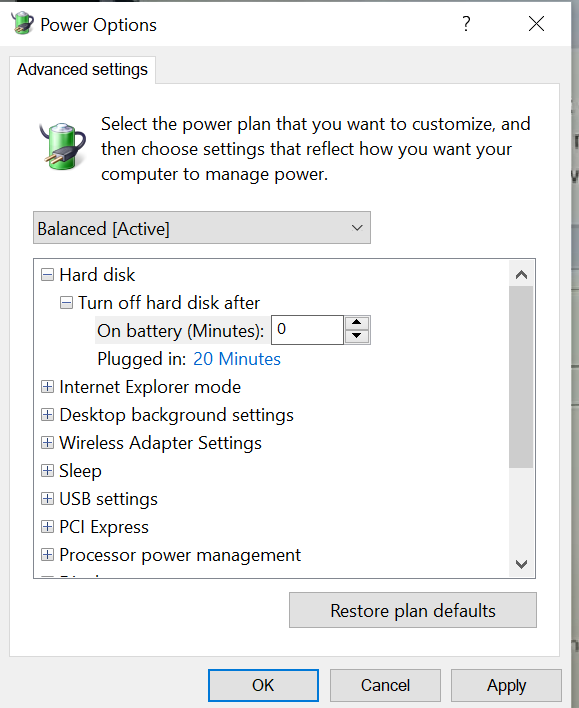
Under Advanced Settings:
Expand Hard Disk > Turn off hard disk after: Set minutes to 0
Expand PCI Express > Link State Power Management: Set to Off.
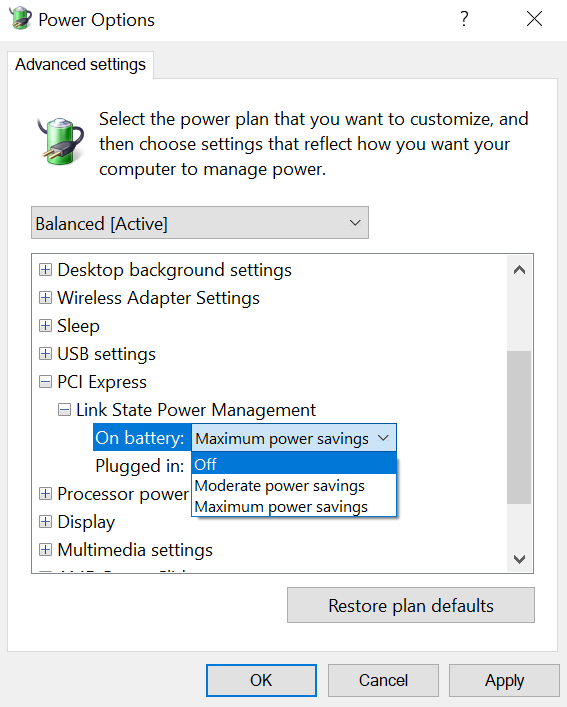
Click Apply and then OK.
Save changes and close the window.
Step 6: Disable ACPI Battery Driver (Optional)
In the Windows search bar, type This PC, choose Manage.
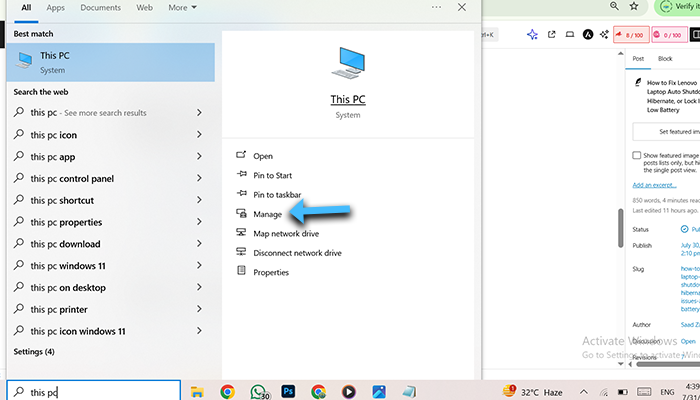
Go to Device Manager.
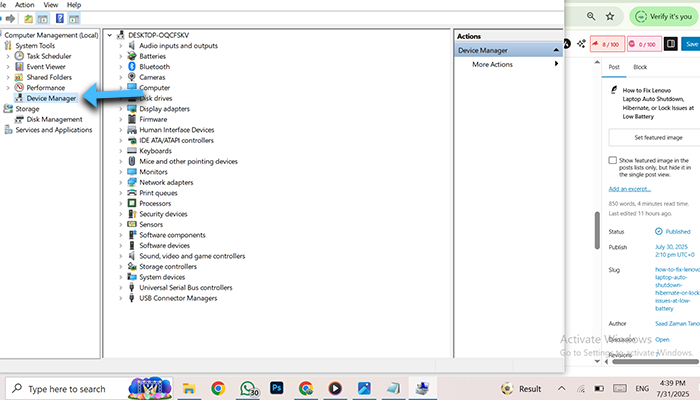
Expand the Batteries section.
Right-click on Microsoft ACPI-Compliant Control Method Battery.
Click Disable device and confirm with Yes.
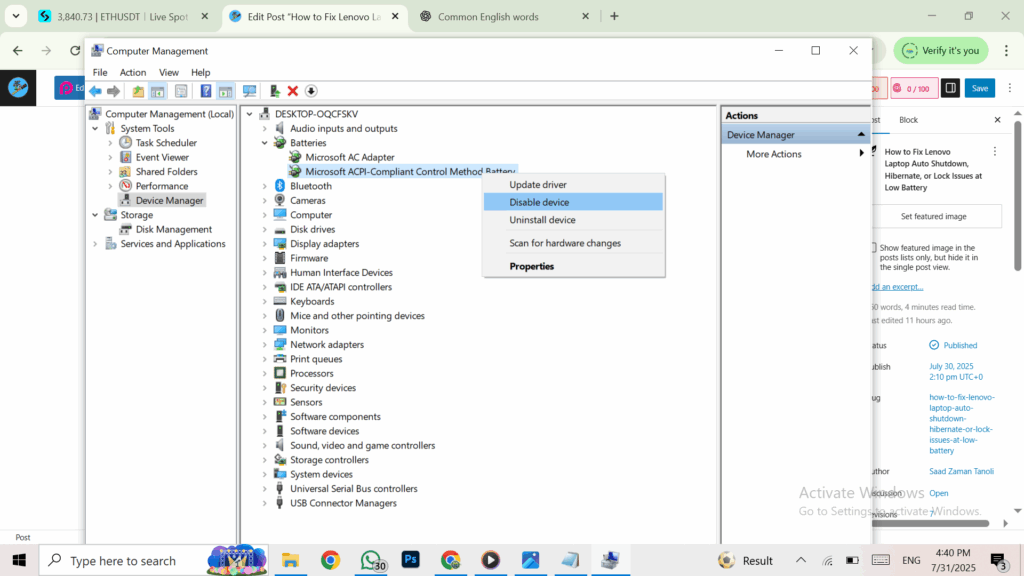
📝 Disabling this temporarily helps identify if the issue is caused by the battery management driver.
Step 7: Restart Your Laptop
Now restart your Lenovo laptop normally.
Go to Start > Power > Restart.
Image Credits
📸 All images and screenshot edits used in this blog post are credited to Saad Zaman Tanoli, who has improved them for better user understanding.
Frequently Asked Questions (FAQs)
Q1: Why does my Lenovo laptop shut down at 10% battery?
Answer: This usually happens due to aggressive battery saver settings or system hibernation triggers when the battery reaches a critical level.
Q2: My laptop doesn’t turn on even after pressing the power button. What should I do?
Answer: Plug in the charger, wait 2 minutes, then press and hold the power button. This wakes the laptop from deep hibernation.
Q3: Is it safe to disable the battery driver in Device Manager?
Answer: It’s safe for troubleshooting, but it’s not recommended as a permanent fix. Always enable it again later.
Q4: How do I prevent hibernation permanently?
Answer: Adjust your power settings as shown above and disable auto-hibernation when on battery.
Q5: Does this fix apply to all Lenovo laptops?
Answer: Yes, especially IdeaPad and Yoga models, though the UI might vary slightly by Windows version.
Final Result
After following the complete procedure:
✅ Your Lenovo laptop will no longer shut down, hibernate, or lock itself unexpectedly at low battery.
✅ Battery saver won’t force your device to enter hibernation.
✅ Safe mode and power settings will be optimized for smoother performance.
Additional Tip
💡 Always keep your battery above 15% and disable auto-hibernation for critical battery levels. Consider using battery health check tools for long-term management.
Conclusion
Random shutdowns and lock issues due to low battery can be frustrating, but with the right settings and adjustments, you can permanently fix these problems on your Lenovo laptop. Just follow the steps in this guide, and your system will stay responsive—even when running low on charge.
💬 Got any questions or facing a similar issue? Let me know in the comments below!.