Introduction
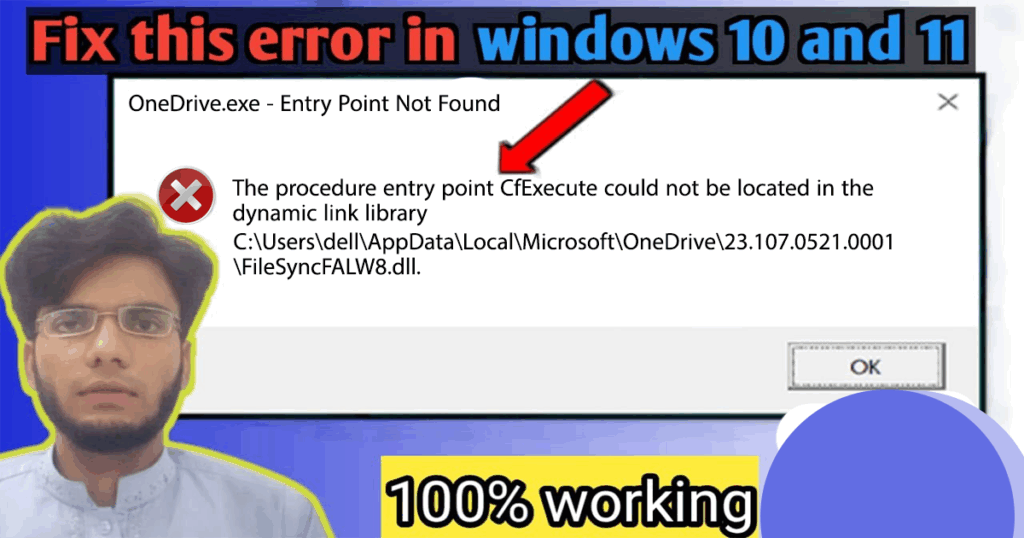
Fix CfExecute DLL Error in Windows 10 — this annoying startup issue usually begins with a popup saying:
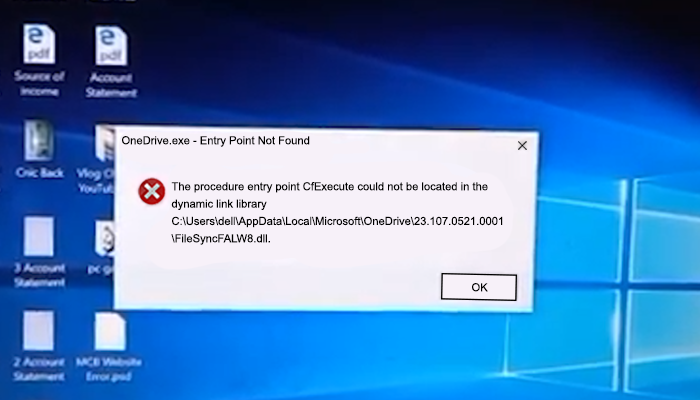
“Onedrive.exe – Entry Point Not Found. The procedure entry point CfExecute could not be located in the dynamic link library…”
Imagine powering on your Windows 10 computer, expecting to dive into work — but instead, you’re blocked by this frustrating error.
That was exactly my experience on a Lenovo laptop. But let me clarify: this issue isn’t Lenovo-specific.
After testing it on Dell and Toshiba systems, it became obvious — this is a Windows 10-related OneDrive error, not a hardware fault.
No matter what brand you use, the fix I’ll walk you through below should solve the problem.
🎥 Prefer Watching the Fix Instead?
If you’re more of a visual learner or want to see exactly how it’s done, check out the video below:
📺 Want to watch this video on YouTube? Click or tap the link below:
https://youtu.be/sMWZg7ELuCE
🧾 Summary of the Problem
This error typically appears immediately after logging into Windows 10. It’s related to OneDrive’s startup process attempting to load a function (CFExecute) from a system DLL (Dynamic Link Library), which is either corrupted, outdated, or incompatible.
The likely cause is a conflict between system files and a corrupted or outdated OneDrive installation.
🛑 Problem Symptoms:
• A popup appears at login:
“Onedrive.exe – Entry Point Not Found: The procedure entry point CFExecute could not be located…”
• OneDrive icon fails to appear in the system tray.
• Background sync is broken.
• System may run slower during startup.
• Error repeats after every restart.
🔧 How to Fix It Step-by-Step
The following steps will help you fix this problem.
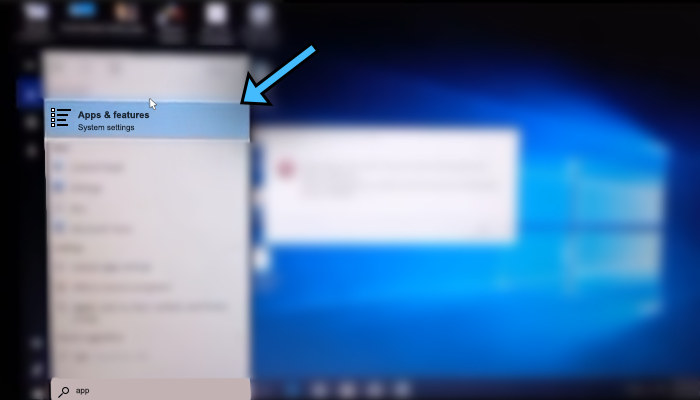
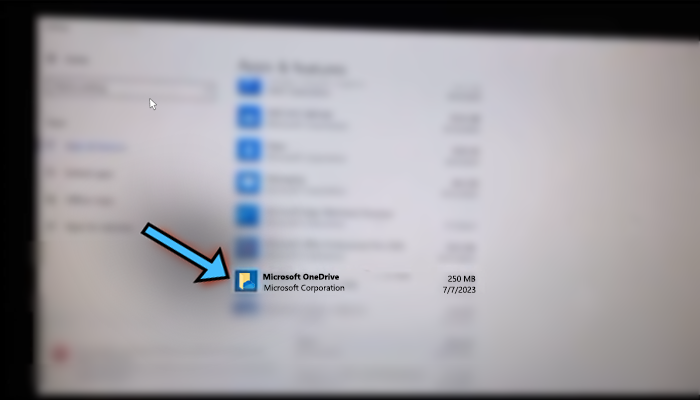
🔹 Step 1: Open Apps & Features
• Click on the Windows Search Box in the taskbar.
• Type app, and click on Apps & Features from the results.
🔹 Step 2: Locate Microsoft OneDrive
• Scroll to find Microsoft OneDrive.
• Click on it to reveal Modify and Uninstall options

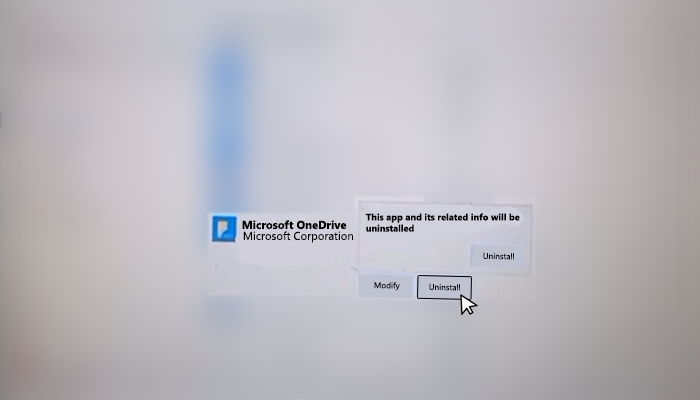
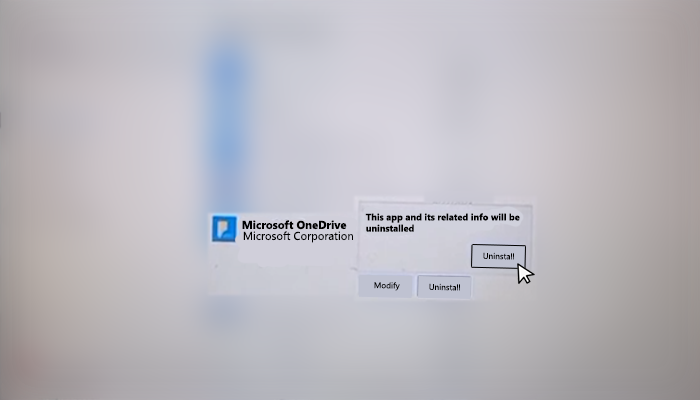
🔹 Step 3: Uninstall OneDrive
• Click Uninstall.
• Confirm when prompted:
“This app and its related info will be uninstalled.”
• Click Uninstall again.
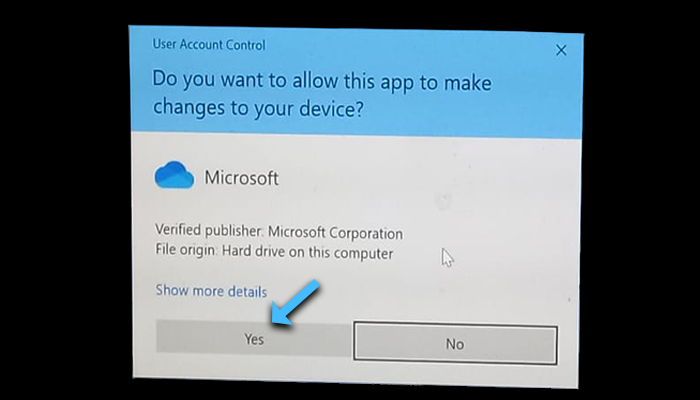
• When the User Account Control dialog box appears, click Yes.
❗ Note: If OneDrive still appears in the list, repeat the uninstall process until it disappears.
🔹 Step 4: Reinstall OneDrive
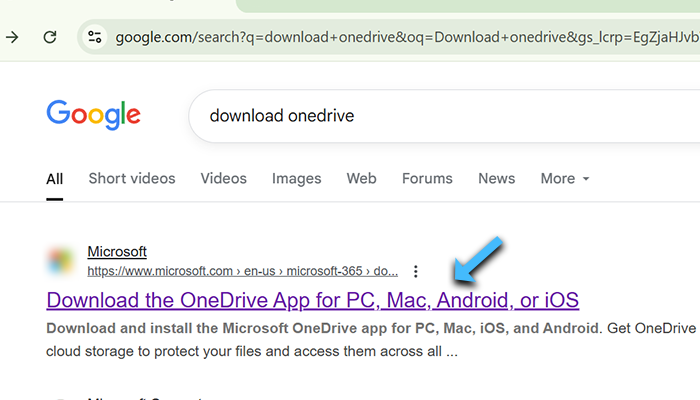
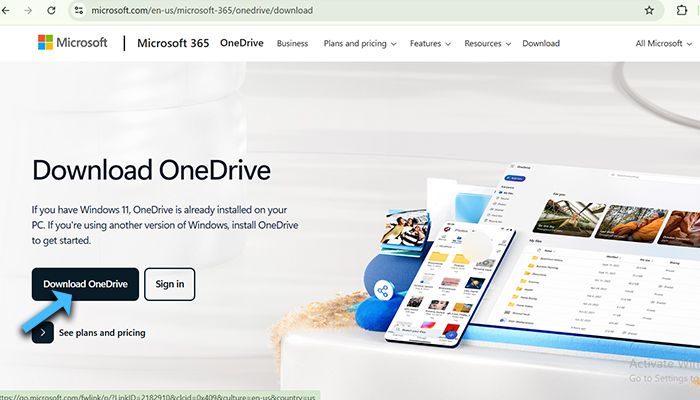
• Open your browser and search: Download OneDrive
• Click on the official Microsoft link.
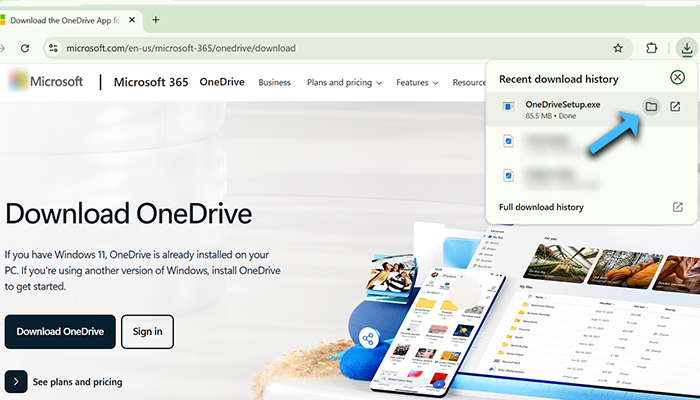
• Download the OneDrive setup.

🔹 Step 5: Install the Setup
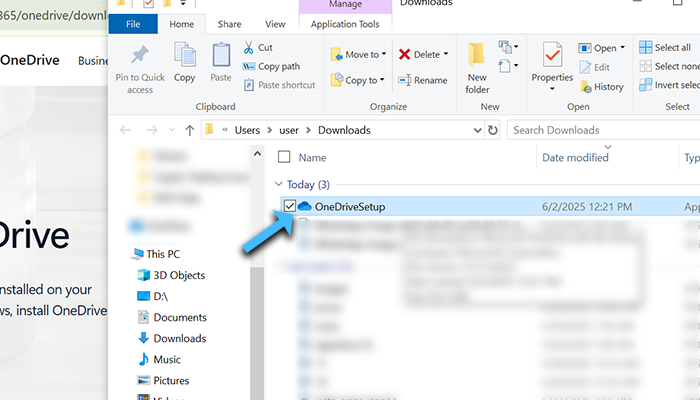
• Once downloaded, open the file location.
• Double-click the installer.
• Click Yes on the UAC prompt.
🔹 Step 6: Verify Installation
• Go to Settings > Apps & Features.
• Make sure Microsoft OneDrive is listed again.
• Restart your computer.
📥 OneDrive Setup After Reinstallation
After some time, you’ll notice the OneDrive icon appear in the bottom right corner (system tray) of your screen.
- Click the OneDrive icon in the taskbar.
- Click the Sign In button.
- A setup pop-up will appear.
- Enter your email address. If you don’t have an account, click Create Account.
- Click Sign In.
- Click Next.
- You’ll be asked:
“Do you want to send optional data about OneDrive & Office to Microsoft?”
Choose one:
o ✅ Send optional data
o 🚫 Don’t send optional data
Select your preference and click Accept. - Click Next to confirm folder location (default is usually in C: drive).
- If prompted:
“The OneDrive folder already exists on this PC.”
Click Use this folder. - On the Sync your files screen:
o Uncheck \”Sync all files and folders in OneDrive\” if not needed.
o Click Next, then Not now, and keep clicking Next and Later as needed. - Close the popup.
✅ Now, OneDrive is successfully signed in and fully set up.
That’s how you can fix the CfExecute DLL Error in Windows 10.
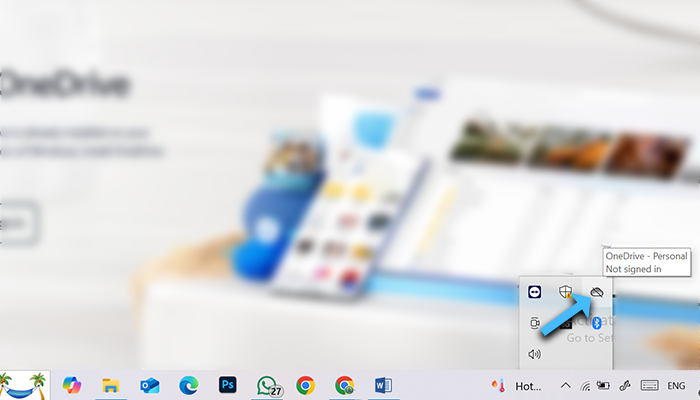
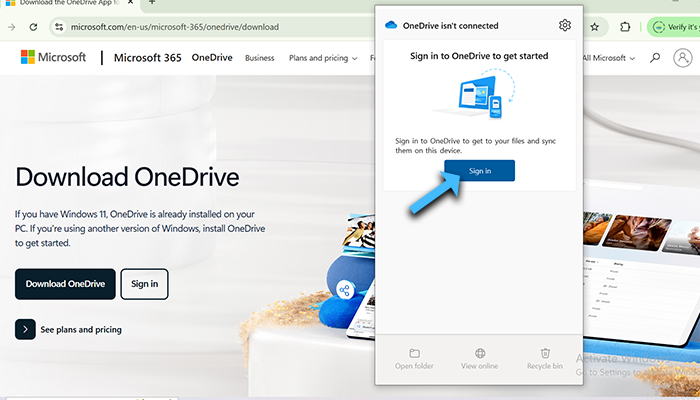
Image Credits:
All images used in this post were created and edited by Saad Zaman Tanoli – Get Information and Knowledge.
Note: Any brand names or logos shown are the property of their respective owners and are used here for educational purposes only.
🎥 Prefer Watching the Fix Instead?
If you’re more of a visual learner or want to see exactly how it’s done, check out the video below:
📺 Want to watch this video on YouTube? Click or tap the link below:
https://youtu.be/sMWZg7ELuCE
Image Credits:
All images used in this post were created and edited by Saad Zaman Tanoli – Get Information and Knowledge.
Note: Any brand names or logos shown are the property of their respective owners and are used here for educational purposes only.
❓ Frequently Asked Questions (FAQs)
Q1: What causes the ‘CFExecute’ error?
Answer: Usually a corrupt or outdated OneDrive version conflicting with system DLLs.
Q2: Will this fix delete my files?
Answer: No. Your cloud files are safe on OneDrive servers.
Q3: Does this fix work on Windows 11?
Answer: Yes, although menus may look slightly different.
Q4: What if OneDrive reinstalls itself again?
Answer: You can disable auto-install via Group Policy or Task Manager.
Q5: Do I need to back up my data before uninstalling OneDrive?
Answer: No, uninstalling OneDrive from your PC does not delete your cloud data. Your files remain safely stored on the OneDrive server and can be accessed after reinstalling.
Q6: What if I can’t uninstall OneDrive — the Uninstall button is greyed out?
Answer: In that case, you can use PowerShell to manually remove OneDrive. Open PowerShell as an administrator and run:Get-AppxPackage *OneDrive* | Remove-AppxPackage
Q7: Can I disable OneDrive instead of uninstalling it?
Answer: Yes, if you don’t want to uninstall, you can disable it from startup using Task Manager or disable OneDrive entirely using Group Policy Editor.
✅ Final Result
After completing the steps:
• ✅ Error popup disappears.
• ✅ OneDrive sync is restored.
• ✅ System tray shows the OneDrive icon.
• ✅ Boot performance improves.
• ✅ You’re signed in and back to normal usage.
💡 Additional Tip
If you don’t use OneDrive actively but want to keep it installed:
• Press Ctrl + Shift + Esc to open Task Manager.
• Go to the Startup tab.
• Right-click Microsoft OneDrive > Disable.
This prevents future startup errors without uninstalling the app.
🏁 Conclusion
In this blog, you learned that:
- ✅ The “Onedrive.exe – Entry Point Not Found: CFExecute” error is frustrating — but entirely fixable.
- ✅ Regardless of your laptop brand (HP, Dell, Lenovo, Toshiba), the root cause lies in Windows 10 and a corrupted OneDrive installation.
- ✅ By uninstalling and reinstalling OneDrive and completing the sign-in/setup steps, you can resolve the issue permanently.
- ✅ You don’t need any third-party tools or advanced technical skills — just follow the built-in Windows steps provided.
- ✅ If the error returns in the future, simply repeat the uninstall and reinstall method to restore OneDrive functionality instantly.
🧰 Related: How to Fix Casio fx-991ES PLUS Not Turning On
Similar to software issues, hardware problems like a calculator not powering up can also cause frustration. Here’s our full tutorial on how to fix Casio fx-991ES PLUS at home.
💬 Got Questions or Feedback?
If you found this guide helpful or have any questions, feel free to leave a comment below. Your feedback helps us improve and continue creating valuable content.